There are times when we need to add various pages in our Add-In and style them as per our needs. Below is an example on how to add a custom ASPX page and style it as per our requirement.
Open Visual Studio and create a new Project with template Apps for SharePoint. Name it as CustomPageStyle.
Give the URL of your Developer Site on which you want to test your add-in and choose SharePoint-Hosted.
In Solution Explorer, you have a Default.aspx page already available. This is the default page that is displayed when the add-in is loaded. You can modify this page or add a new page. Let’s add a new page in this example.
Right click on Pages in Solution Explorer –> Add –> New Item –> Page. Name it as ContactUs.aspx.

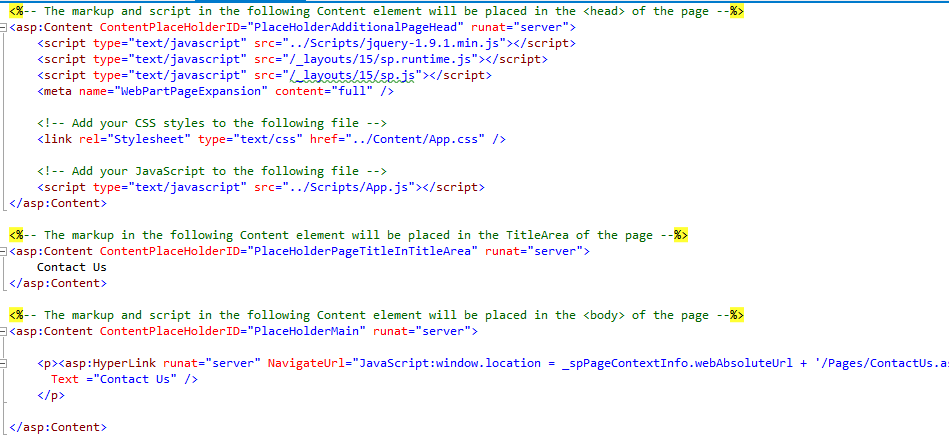
This is how a custom ContactUs.aspx page looks by default.

You can see that there is Head and Main area, but no Title area. Let’s add a Title area (below code) between Head and Main.
<asp:Content ContentPlaceHolderID="PlaceHolderPageTitleInTitleArea" runat="server">
    Contact Us
</asp:Content>
For the CSS styling, you can add your own CSS file or embed your code in existing app.css file. Let’s put our code in app.css file only. As of now, we will link app.css with our new page. Put the below code in <asp:Content> element with ContentPlaceHolderId = PlaceHolderAdditionalPageHead.
<link rel="Stylesheet" type="text/css" href="../Content/App.css" />
In <asp:Content> element with ContentPlaceHolderId = PlaceHolderMain, remove all the code and write the below code there:
    <h3>Contact Us:</h3>
    <p>Tutorials4SharePoint, 156/7, Connaught Place, New Delhi</p>
    <p>+91 9999999999</p>
    <p>https://tutorials4sharepoint.wordpress.com/</p>
Default.aspx page is the landing page for our add-in. Let’s add a link on Default.aspx page to navigate to our new custom page. Add the below markup in <asp:Content> element with ContentPlaceHolderId = PlaceHolderMain
<p><asp:HyperLink runat="server" NavigateUrl="JavaScript:window.location = _spPageContextInfo.webAbsoluteUrl + '/Pages/ContactUs.aspx';"
    Text="Contact Us" />
</p>
Open app.css file and add the following line in the file. You can write any CSS code here.
p {color:darkgreen;}
Change the AppManifest.xml as per below screenshot:

Final Default.aspx page will look like:

Final ContactUs.aspx page will look like:

Press F5 and test the code. You will see Deafult.aspx as the landing page of the add-in.

Click on Contact Us link at the bottom of the logo, you will be navigated to our ContactUs custom page.