Environment Setup for SPFx

Setup Office 365 tenant
  • Create App Catalog: We need App Catalog to upload and deploy web parts.
  • Create Developer Site: SharePoint Site Collection or site to test the web part.
  • Workbench: It is a developer design surface that enables you to quickly preview and test web parts without deploying them in SharePoint. SharePoint workbench can be accessed from any SharePoint site in your tenancy using following URL:
    https://your-sharepoint-site/_layouts/workbench.aspx
Setup development environment
  • Install a code editor
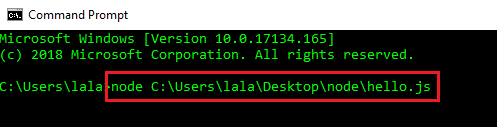
  • Install NodeJs (The current supported LTS version of NodeJS for the SharePoint Framework is both 8.x and 10.x. Notice that 9.x , 11.x and 12.x versions are currently NOT supported with SharePoint Framework development).
  • At this time, Node.js v12.x is the Active LTS version listed on the Node.js homepage as the default download. To download Node.js v10.x, use the Node.js > Downloads > Previous Releases page.
  • For SharePoint Server 2016, recommended version of Node is 8.x.x
  • For SharePoint Server 2019 and SharePoint Online it is 10.x.x
  • My Node version is 10.16.0 and gulp version is 3.9.1
  • Install Yeoman and Gulp.
    • These are the packages from NPM package manager and are basically tools which we use for SharePoint Framework development.
    • Yeoman is an open source client-side scaffolding tool for web applications. Yeoman runs as a command-line interface written for Node.js and combines several functions into one place, such as generating a starter template, managing dependencies, running unit tests, providing a local development server, and optimizing production code for deployment.
    • Gulp is a cross-platform, streaming task manager that lets developers automate many development tasks.
    • Once you install NodeJs, open Command Prompt and type the following command.
      npm install -g yo 
      npm install -g gulp
  • Install Yeoman SharePoint Generator
    • It help you to quickly create a SharePoint client-side solution project with the right toolchain and project structure. Enter the following command to install it.
      npm install -g @microsoft/generator-sharepoint

Setup PowerBI Desktop and Online

In simple words, Microsoft PowerBI is a collection of software services, apps and connectors that work together to turn your unrelated source of data into coherent, visually impressive and interactive insights.

Whether your data is a simple Microsoft Excel workbook, or a collection of cloud-based and on-premises hybrid data warehouses, Power BI lets you easily connect to your data sources, visualize (or discover) what’s important, and share that with anyone or everyone you want.

PowerBI Desktop
  • PowerBI Desktop is a free windows desktop application which we can install on our local computer that lets us to connect to our data, transform and visualize it.
  • With MS PowerBI desktop application, we can connect to different data sources, combine them into a data model that lets us build visuals.
  • We can share this collection of visuals as reports with other users within our organization using PowerBI Service (Online version).
  • You can download and install it from here.
PowerBI Service
  • This is the Online version of PowerBI.
  • We can Publish the reports that we created using PowerBI Desktop to it.
  • We can also create reports directly using PowerBI Service.
  • It is NOT free like PowerBI Desktop.
  • If you want to include PowerBI with Office 365, you can purchase the license for Office 365 Enterprise E5.
PowerBI Mobile Apps
  • There are mobile apps and are available on Windows phone and tablets, Apple iOS and Google Android devices.

TypeScript Environment Setup

There are multiple ways to setup the environment for TypeScript.

I will be using Visual Studio Code to create applications using TypeScript.

Download and install Node.js as per your system configuration.

Open Node.js command prompt. Use it to install TypeScript.

If you get any error while using below command, verify whether you have installed Node.js crrectly or not. Use node -v command to get the version number of Node.js and to verify the successful installation of Node.js.

Download and install Visual Studio Code as per your system configuration.

Node.js Environment Setup

Below are the steps to setup the environment of Node.js on Windows:

    • We need two softwares to develop Node.js applications: Text Editor and Node.js binary installables.
    • Text Editor can be a Windows Notepad. We need to write our code in Notepad and save the file with .js extension.
    • The source code is simply JavaScript code.
    • We can install the latest version of Node.js from here. You can find the links for various Operating Systems and for 32-bit/64-bit operating systems.
    • For Windows, an .msi file will be downloaded. You can run the setup and install the software. By default, it will be installed at C:\Program files\nodejs location.
    • Now write the following code in a NotePad and save that file with the name hello.js. Let’s say you have saved this file at
      console.log("Hello, World!")
      
    • Open the Command Prompt on Windows and write the following code.
  • When you press Enter, you will see Hello, World! written on Command Prompt.

Congrats! You have just created your first NodeJS application.

Power Platform Academy

Start or Upgrade your Career with Power Platform

Learn with Akanksha

Python | Azure | AI/ML | OpenAI | MLOps

Design a site like this with WordPress.com
Get started