Below are the steps to create a sample web part (Hello World) in SharePoint Framework. Mae sure to setup the environment before proceeding.
- Open Command Prompt
- Navigate to the directory where you want to create the web part
- Type the following command
yo @microsoft/sharepoint
- You will be prompted to enter few details:
- The suggested solution name will be same as your directory name. Press enter if you want the same name as your solution name. You can change it if you want.
- Select SharePoint Only (latest) and press enter.
- Select Use the current folder to place the files of your project.
- Type N as we do not want our solution to be deployed immediately to all sites without running any feature deployment or adding apps in sites. Press Enter.
- Type N as we our solution does not contain any unique permission.
- Select WebPart as we want to create a web part
- Accept the default web part name. You can also choose the name you want. Remember that this is the Web Part name. We entered Solution name in the first step.
- Accept the default web part description. You can give description of your choice.
- Select the JavaScript framework you want use. You can either choose React or Knockout. You also have the option to not select any JavaScript framework. In this demo, I am not selecting any JavaScript framework.
- Press Enter.

- Now, Yeoman installs the required dependencies and scaffolds the solution file along with the web part. This will take some time.
- Once done, you will get below message.


Test and Preview your SPFx Web Part
Once you get the above message, now install the developer certificate with the following command. This is a one time activity and will be applicable to the complete development environment.
gulp trust-dev-cert
Preview your web part with the following command. This will open the workbench where you can add your web part on the page and preview it.
gulp serve
This command executes a series of gulp tasks to create a local, node-based HTTPS server on localhost:4321 and launches your default browser to preview web parts from your local dev environment.
SharePoint Workbench is a developer design surface that enables you to quickly preview and test web parts without deploying them in SharePoint. SharePoint Workbench includes the client-side page and the client-side canvas in which you can add, delete, and test your web parts in development.
Workbench details are saved in serve.json file in config folder.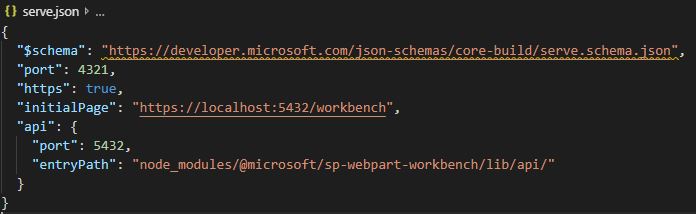
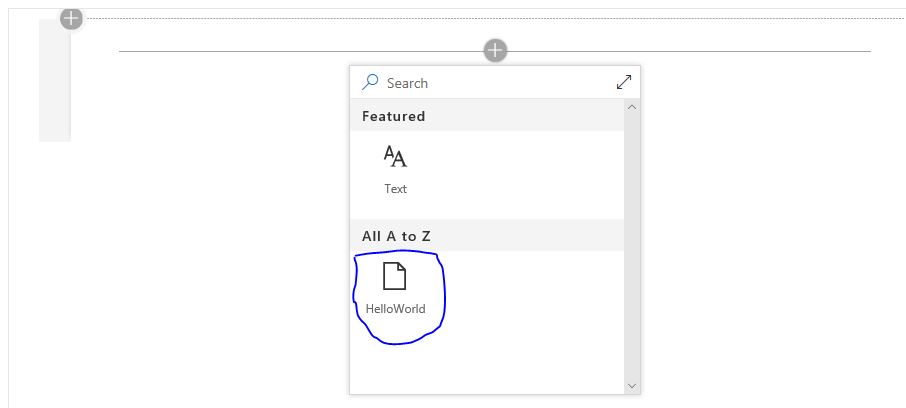
Once the gulp serve command is executed, the local workbench is launched. To add the web part on the modern page, select the + icon. Select the web part you want to add and test. Now you can see the web part.
Below is how the web part looks like when added. I have edited it by clicking on the pencil button on the left side. You can see the custom properties.

Related Articles
SPFx Web Part Folder Structure
