Destructuring allows you to extract array elements or object properties and store them in variables.
const nums = [10,20,30];
[n1, n2] = nums;
[num1, , num3]=nums;
console.log(n1 + " " + n2);
console.log(num1 + " " + num3);

Destructuring allows you to extract array elements or object properties and store them in variables.
const nums = [10,20,30]; [n1, n2] = nums; [num1, , num3]=nums; console.log(n1 + " " + n2); console.log(num1 + " " + num3);
const arr = [10,20,30];
const newArr = [...arr,40,50];

console.log(arr);
console.log(newArr);
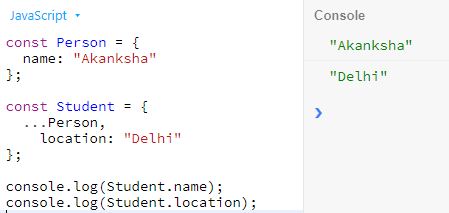
const Person = {
  name: "Akanksha"
};

const Student = {
  ...Person,
    location: "Delhi"
};

console.log(Student.name);
console.log(Student.location);

const PersonDetails = (...details) => {
  console.log("Name: " + details[0]);
  console.log("Address: " + details[1]);
  console.log("Education: " + details[2]);
  console.log("Others: " + details[3]);
}
PersonDetails("Akanksha","Delhi","Graduation");

In previous article, we saw how to create classes, constructors, properties and methods.
In Next Generation JavaScript, we skip constructor function and use Arrow functions for our methods. We can directly declare parameters.
Let’s see below example:
class Person{
    name = "Akanksha";
    address = "Delhi";

  getPersonDetails = () => {
    console.log("Name: " + this.name);
    console.log("Location: " + this.address);
  }
}

class Student extends Person{
  cls = "12th";

  getStudentDetails = () => {
    console.log("Class: " + this.cls);
  }
}

const student = new Student();
student.getPersonDetails();
student.getStudentDetails();


We have seen how to create Classes in JavaScript.
Let’s now learn how to inherit classes in JavaScript.
Below is a sample code for inheritance
class Person{
  constructor(personName, personAddress){
    this.name=personName;
    this.address=personAddress;
  }
  getPersonDetails(){
    console.log("Name: " + this.name);
    console.log("Location: " + this.address);
  }
}

class Student extends Person{
  constructor(name, address,studentClass, studentId){
    super(name, address);
    this.studentClass = studentClass;
    this.Id=studentId;
  }
  getStudentDetails(){
    console.log("Class: " + this.studentClass);
    console.log("ID: " + this.Id);
  }
}

class CollegeStudent extends Student{
  constructor(name, address, stdCls, id, clgName){
    super(name, address, stdCls, id);
    this.CollegeName=clgName;
  }
  getDetails(){
    console.log("College Name: " + this.CollegeName);
  }
}

const student = new CollegeStudent("Akanksha","Delhi","12th",12345,"NIT");
student.getPersonDetails();
student.getStudentDetails();
student.getDetails();

class Person{
  constructor(){
    // setting up properties using this keyword
    this.name="Akanksha";
    this.address="Delhi";
  }
  // creating a custom method within a class
  getName(){
    console.log("Name: " + this.name + " and Location: " + this.address);
  }
}

// creating an object of the class using new keyword.
// constructor function is called as soon as you instantiate a class using new keyword
const prsn = new Person();

// calling method using the object of the class
prsn.getName();

You can also pass the data while instantiating the class

Related Article: Inheritance in JavaScript
When we write JavaScript code, we prefer to split our code in multiple functions and different files. But we want to use these files from one another.
For this, we use import and export. We will also see the concept of named export and default export.
Default Export: We can have only one default export per file. When we import, we have to specify a name of the import. This name can be the actual name or any other name we like. We have to use default keyword when defining the default export.
Named Export: We can have multiple named exports from a single file, but the name of the import module should be same as the name of the export module. They should me enclosed in curly brackets {} while importing.
Let’s have a file names Person.js with following structure. We are using default export here.
const Person = {
  name:"Akanksha"
}
export default Person;
Another file test.js with the following structure. We are using named export here.
export const settings = () => {}
export const url = "URL";
Another file as App.js where we will be importing these two files
// these are default exports
import Person from './Person.js'
import prsn from './Person.js'

// these are named exports
import {settings} from './test.js'
import {url} from './test.js'
The named exports can also be combined in one import like following
import {settings, url} from './test.js'
If there are multiple named exports from one file, we can import them together like below
import * as testData from './test.js'
We can then use this as testData.settings when we want to access that module.
I am using jsbin.com for demo purpose.
function myFunc(parameters){
// lines of code
}
Below is an example of JavaScript function.
function myFunc(name){
  console.log(name);
}
myFunc("Akanksha");
The output of above code is “Akanksha“.
const myFunc = (parameters) => {
// lines of code
}
Below is the conversion of above JavaScript function in an Arrow function.
const myFunc = (name) => {
  console.log(name);
}
myFunc("Akanksha");
The output of above code is also “Akanksha“.
const myFunc = name => {}
const myFunc1 = (name, age) => {
  console.log(name, age);
}
myFunc1("Akanksha",28);
Below is the output of above code

const addition = (num1, num2) => {
  return num1+num2;
}
console.log(addition(10,20));

const add = (n1, n2) => n1+n2;
console.log(add(20,30));
Below is the output of above code

var name="David";
// can use name here
function getName(){
// can use name here as well
}

var name="Mike"; // can be easily re-declared

function myFunc(){
var address="US";
// address can be used anywhere within this function, but not outside this function.
}
for(let i=1;i<=10;i++){
console.log(i); // i is used here
}
// i cannot be used here, throws an error: i not defined

let i=100; // cannot be re-declared, throws an error: i is already declared

function newFunction(){
let phone=78989879;
// phone can be used anywhere within the function, but NOT outside the function.
}
const PI = 3.1416;
PI = 3.14; // This will throw an error
const PI=45.23; // This will also throw an error: Assignment to constant variable
First Authentication to the destination tenant step is performed. The the user is prompted for the source and destination SharePoint Online Site Collection, where you want to migrate your data. Click Migrate to submit the migration job. After this, scanning, packaging, uploading and importing steps are performed in parallel across all the files submitted for migration.
The first step after opening the tool is to authenticate the destination tenant (where you want your files to be migrated). Providing your username and password to the tenant associates the migration jobs you submit to this account. This allows your to resume your migration from another computer if needed by logging in with the same credentials. This account should be a site collection administrator of the destination you want to migrate to.
Various authentication methods that are supported are: NTLM, Kerberos, Forms, ADFS, Multi-factor authentication, SAML based authentication and Client Certificate authentication.
Once you click Migrate, a scan is performed on every file, even for any potential issue. The scan verifies the access to the data source and write access to the SharePoint Online destination.
In this stage, a content package is created that contains a manifest consisting of 8 XMLs.
In this stage, the content package with the manifest is uploaded to Azure. Before a migration job can be accepted from a SPO provided Azure container, the data is encrypted at rest using the AES CBC 256 standard. The files are encrypted along with the manifest files.
In this stage, the key is provided to SPO SAS. Only Azure and SPO are interacting to fetch and migrate the content into the destination. This process is a timer job based, but does not prevent other jobs from being queued up. During the import, a report is created in the working folder and live updates are made. After the migration job is completed, the log is stored in the Azure container and a final report is created. A log is stored in each Manifest Container.
While the migration is being performed the tool save some information of its session in the users hidden list on their MySite. That information will be used later when the tool is reopened to allow to resume any previous migration session. It is possible to remove that information if the user requires more space in their MySite. This will only remove the session from the resume option in the tool and wont affect previous imports.
Start or Upgrade your Career with Power Platform
Python | Azure | AI/ML | OpenAI | MLOps
